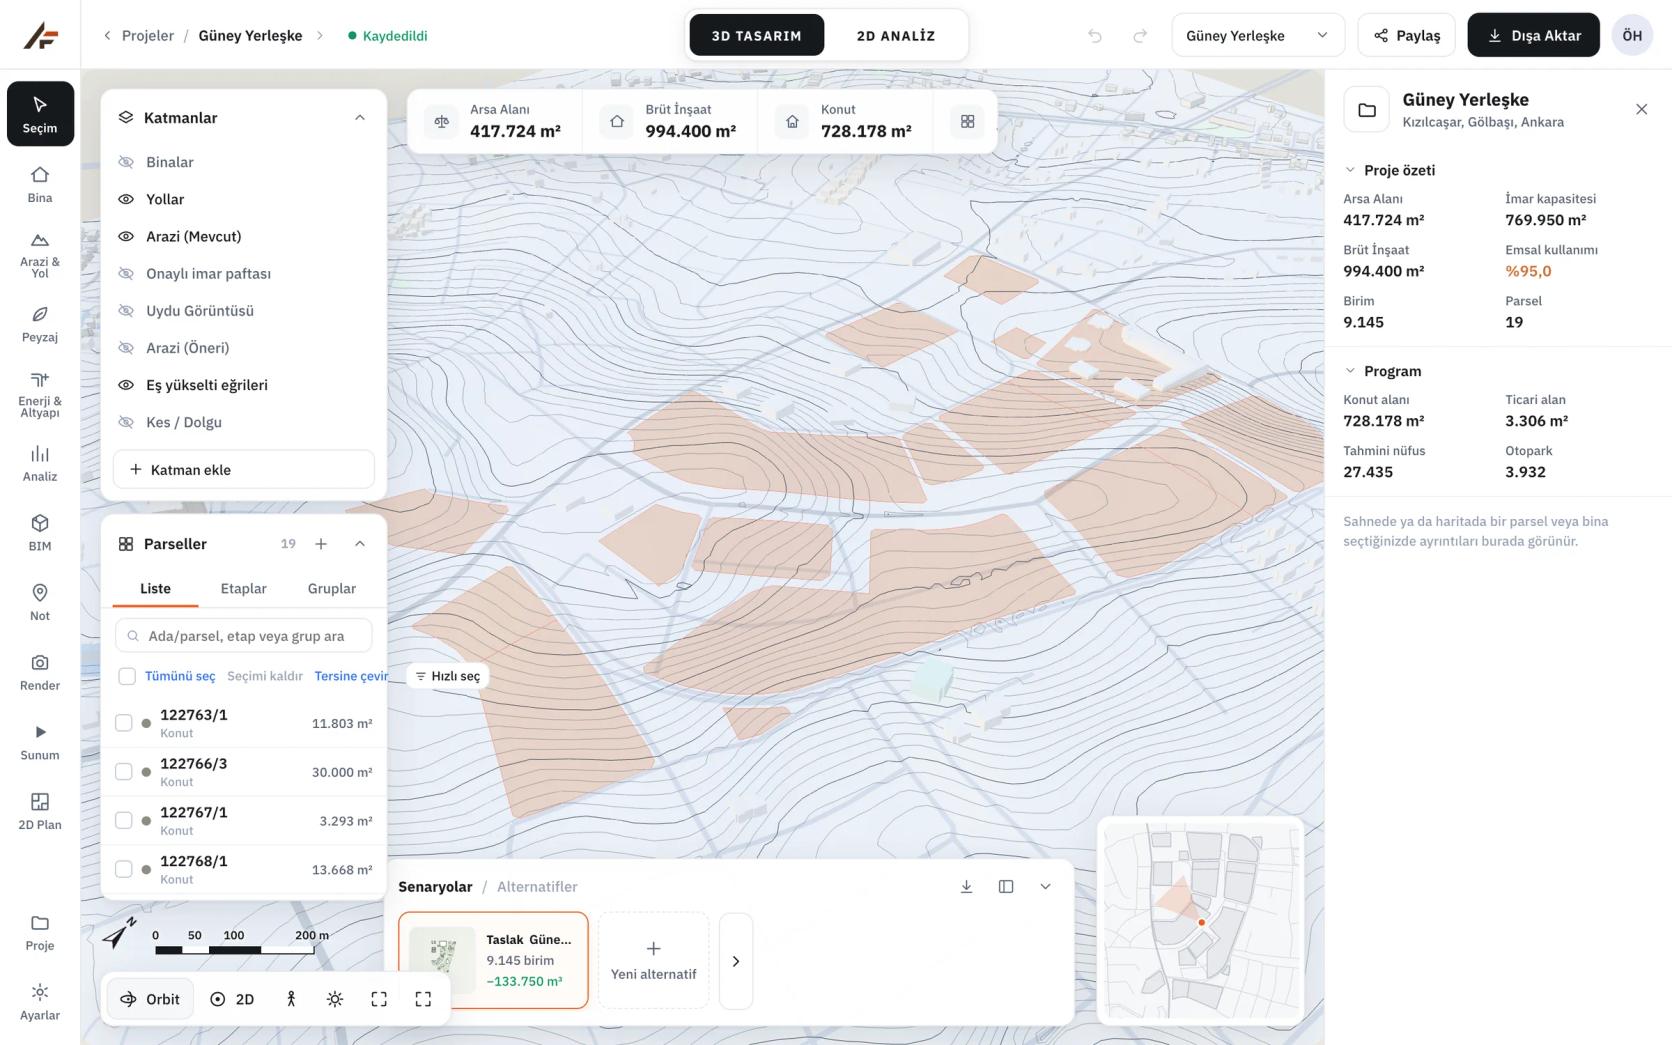
Planning rights per parcel
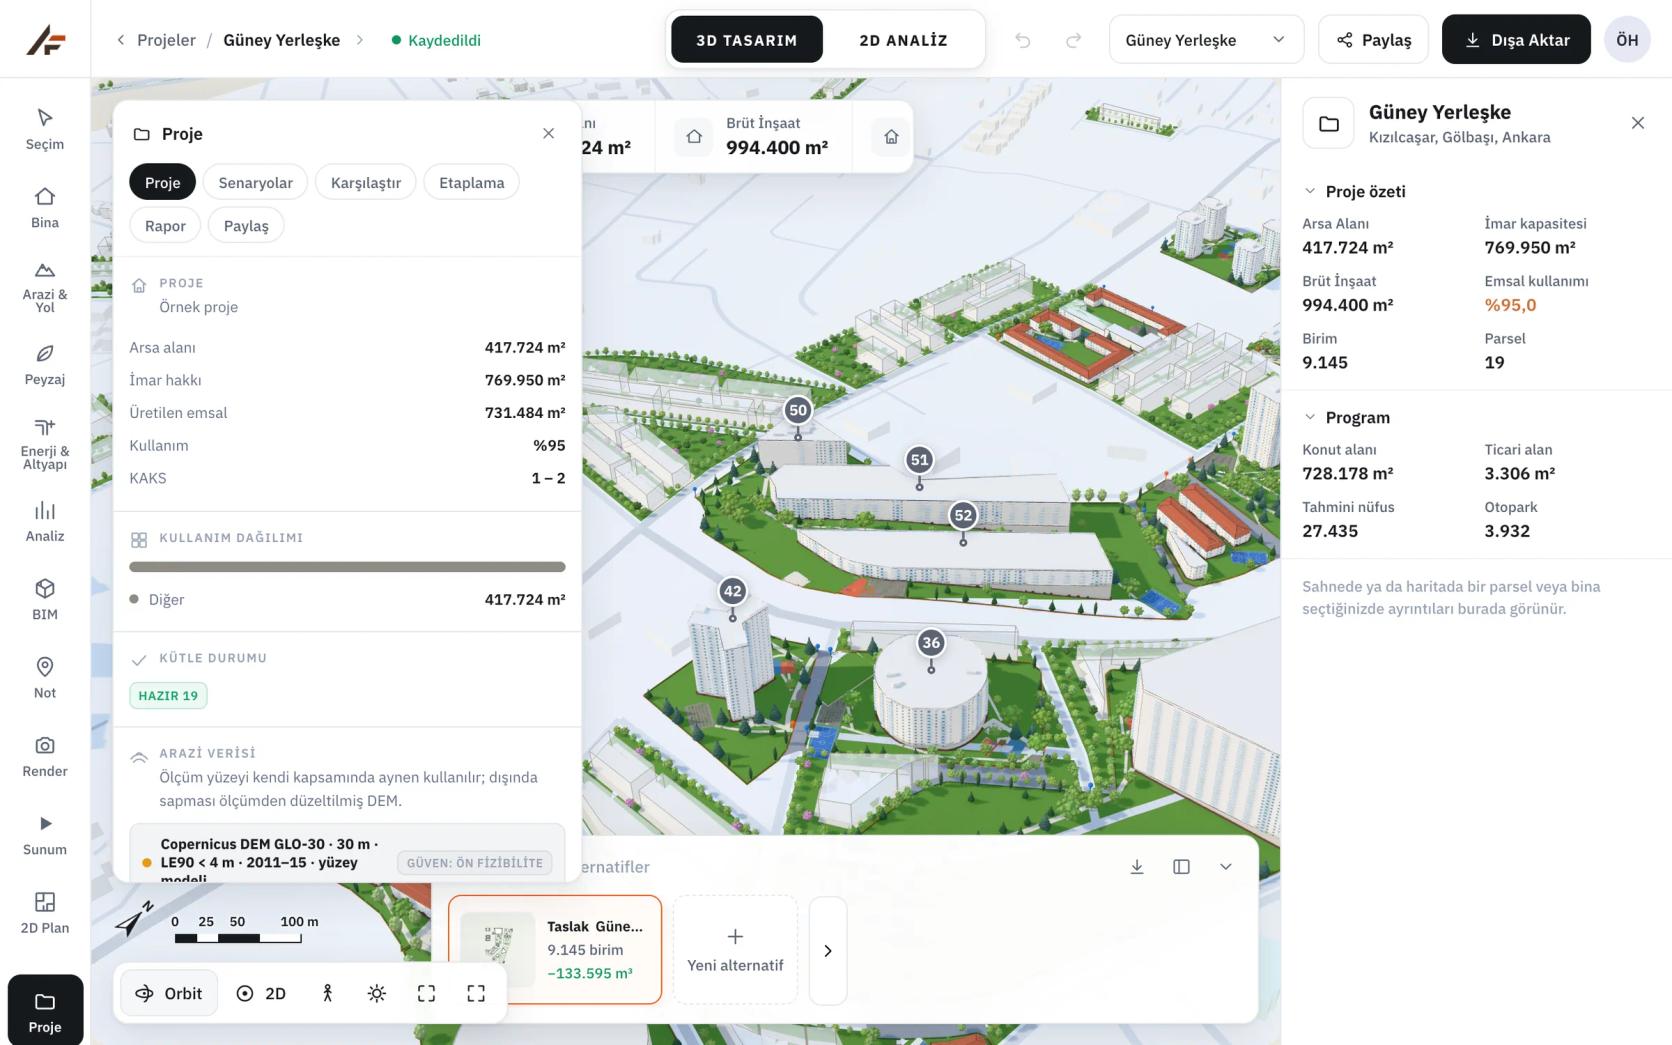
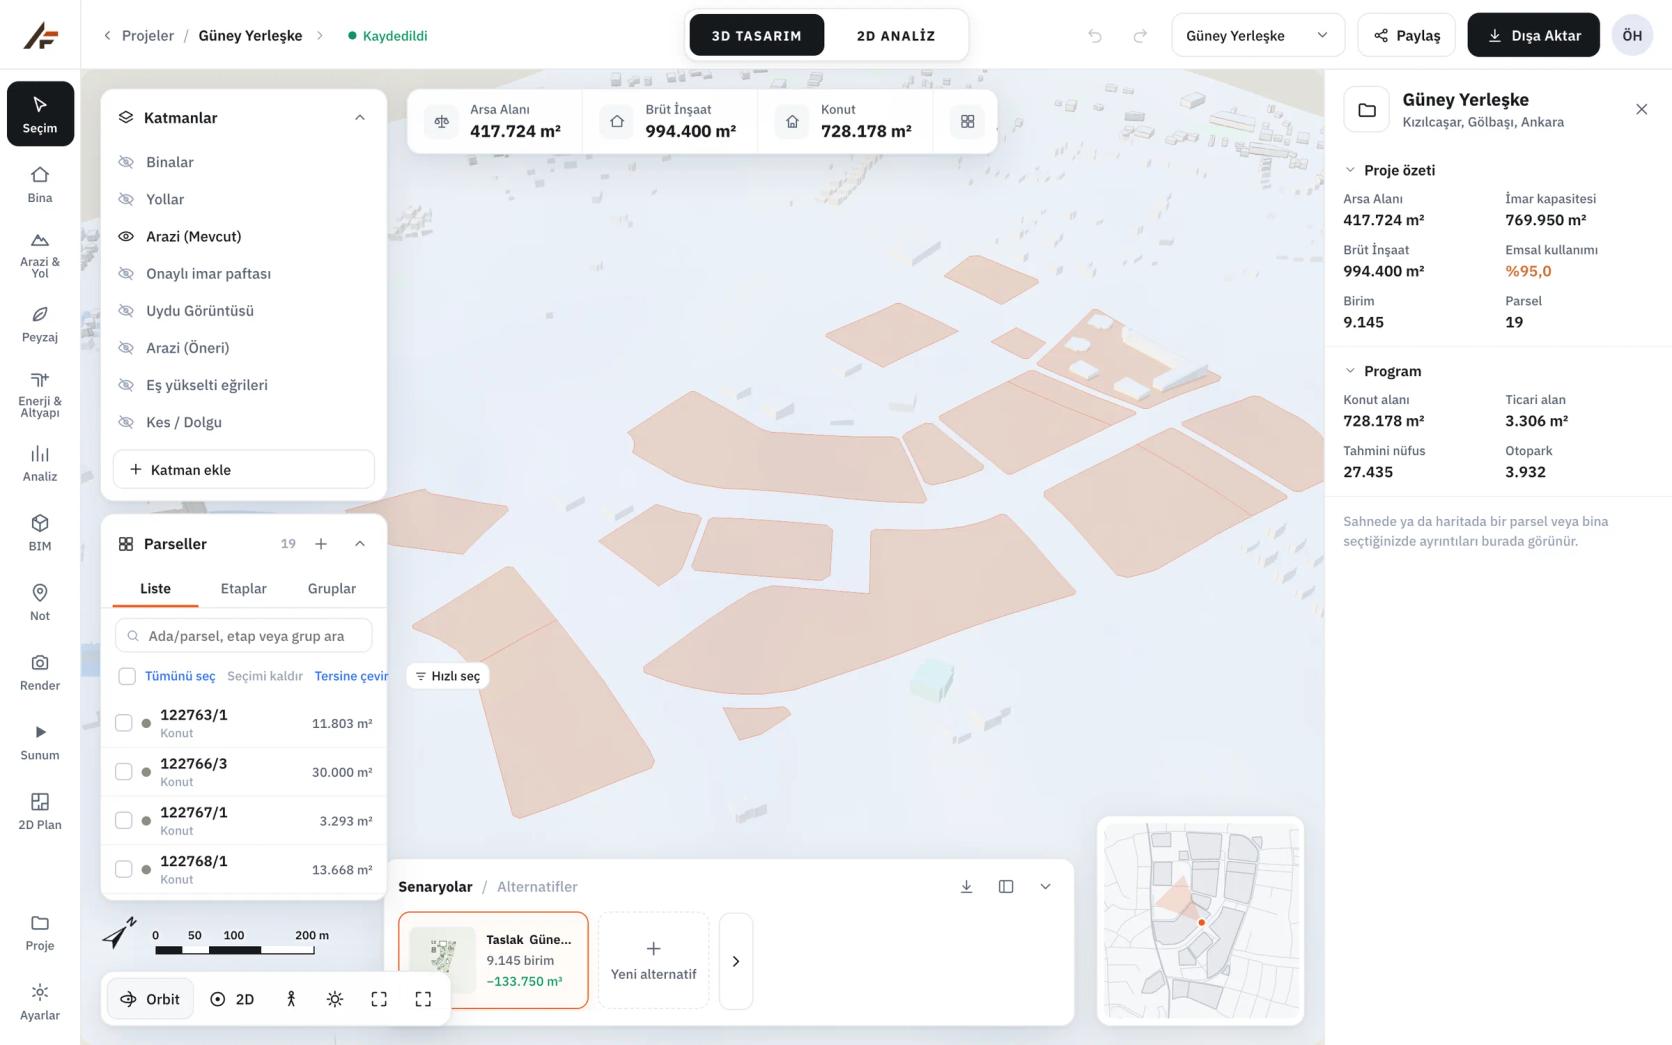
FAR, use and height are kept separately for each parcel; the total is the sum of the parcels.

Start with your block and parcel list. Run planning rights, 3D layout, terrain analysis, phasing and feasibility in one project, on the same numbers.
Product screen · sample project
FAR, use and height are kept separately for each parcel; the total is the sum of the parcels.
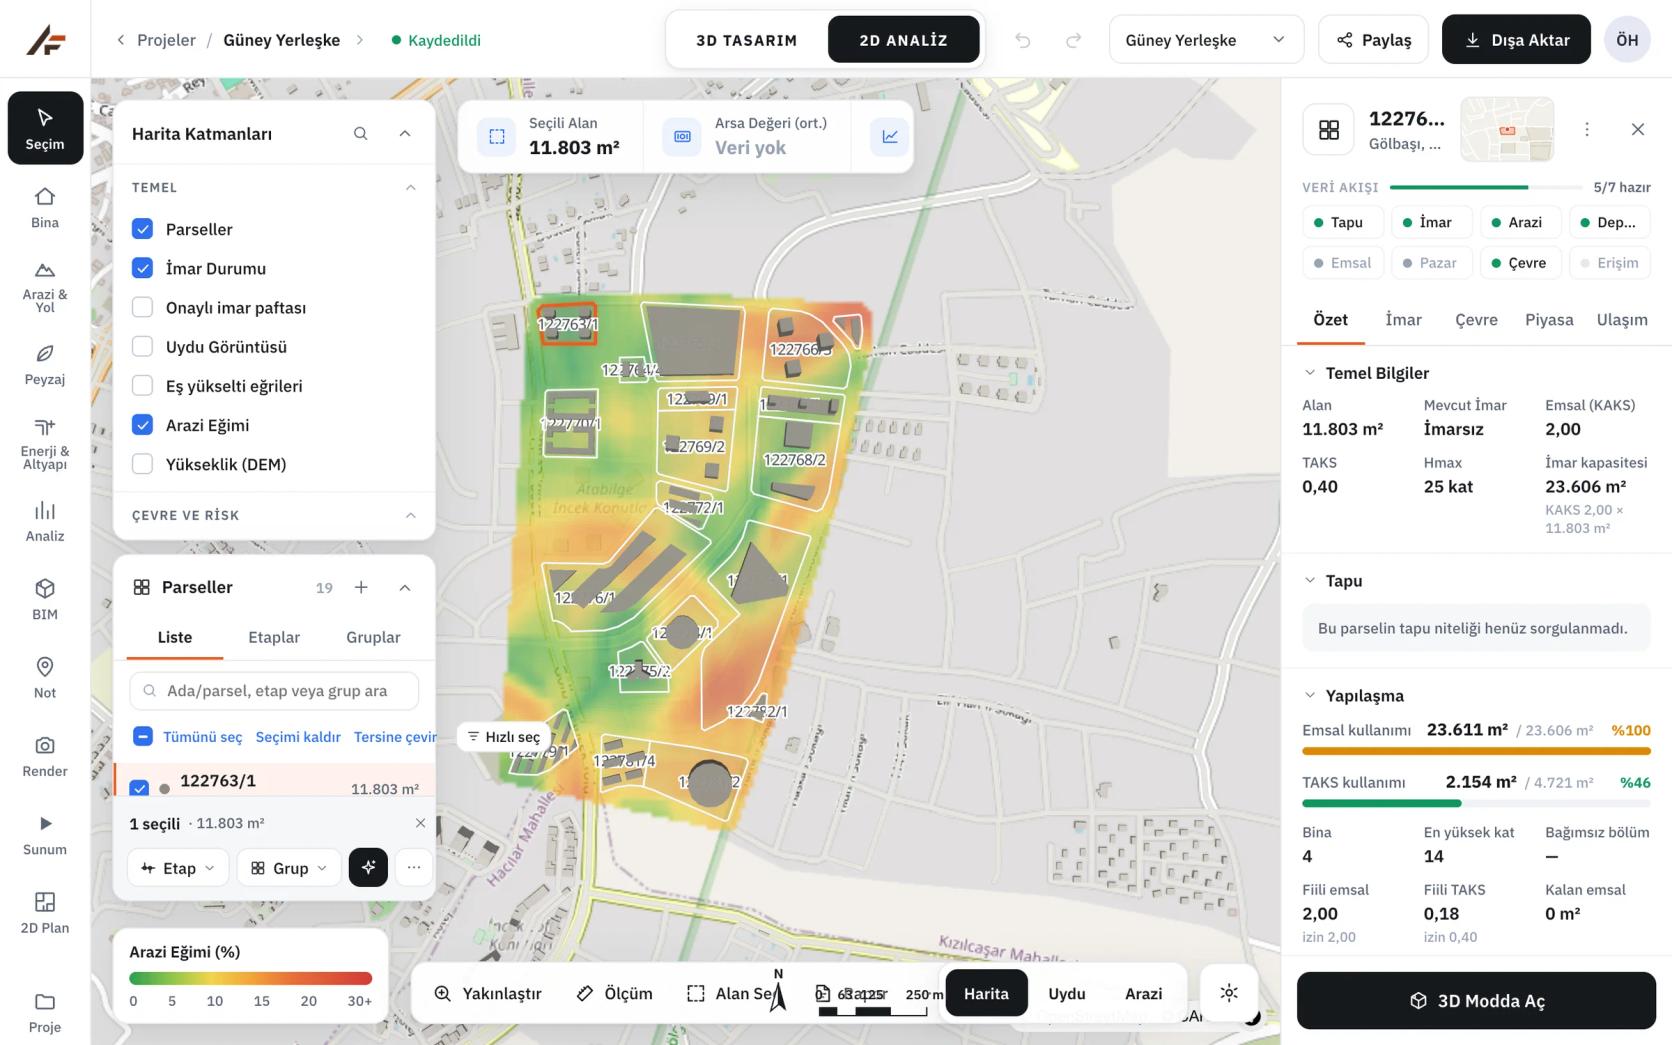
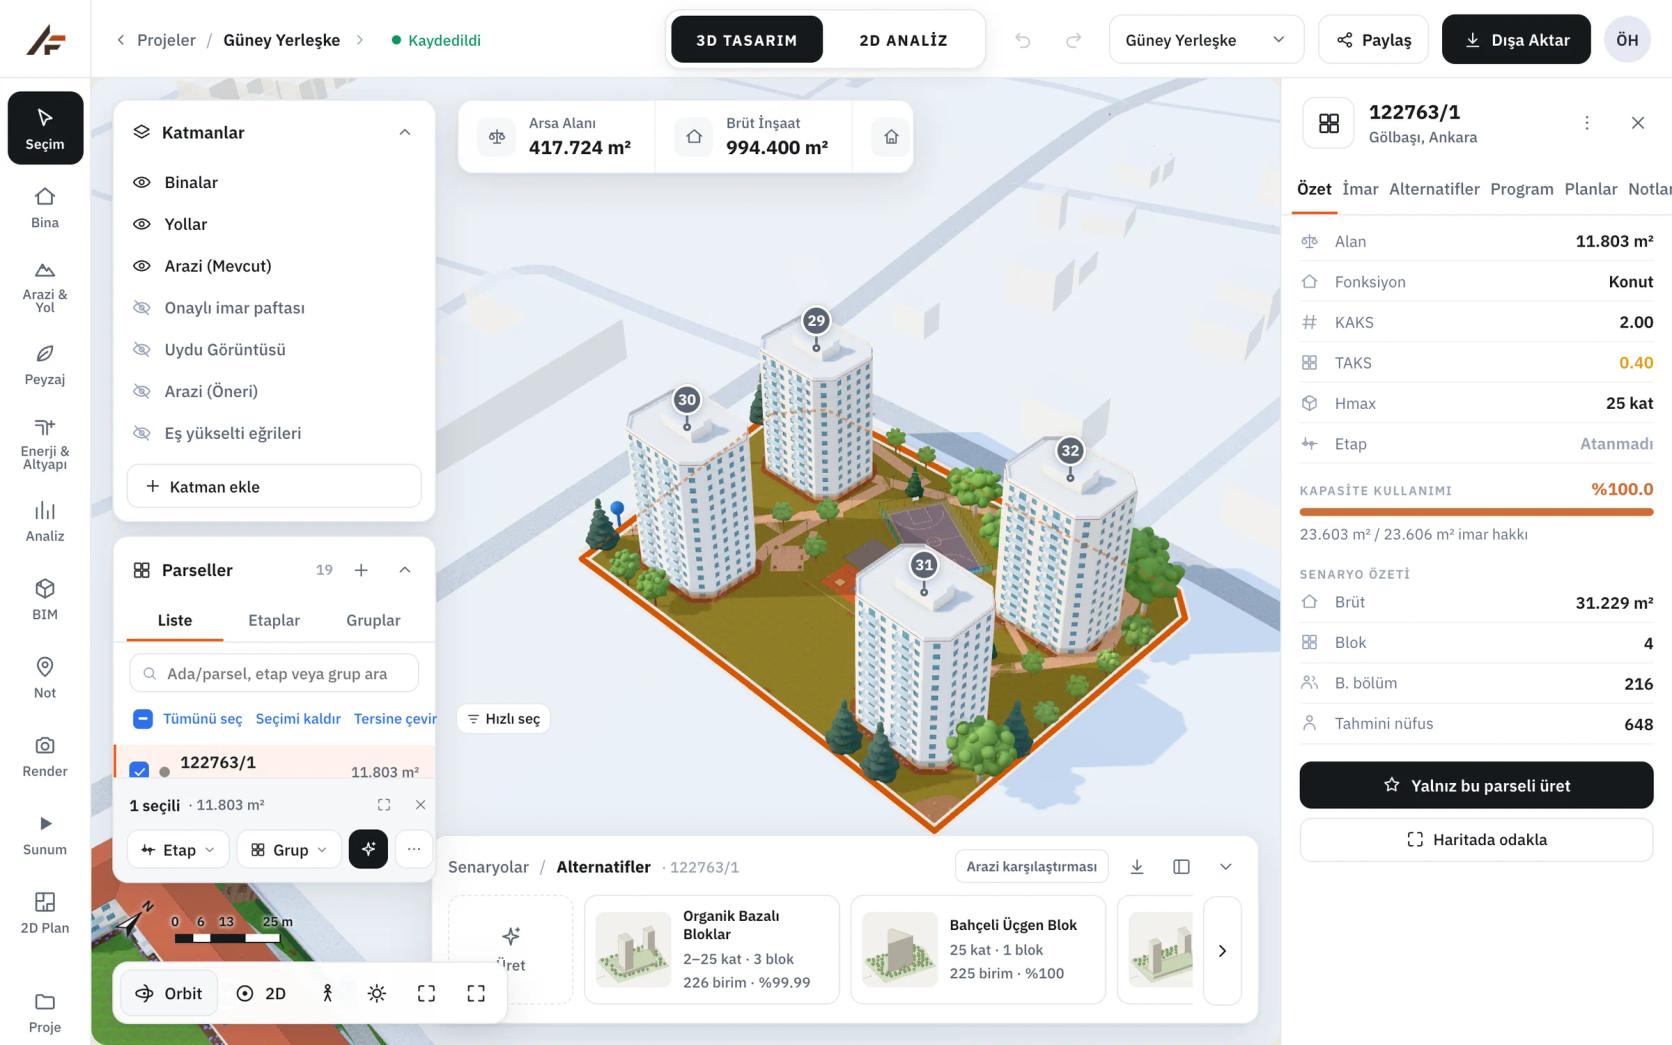
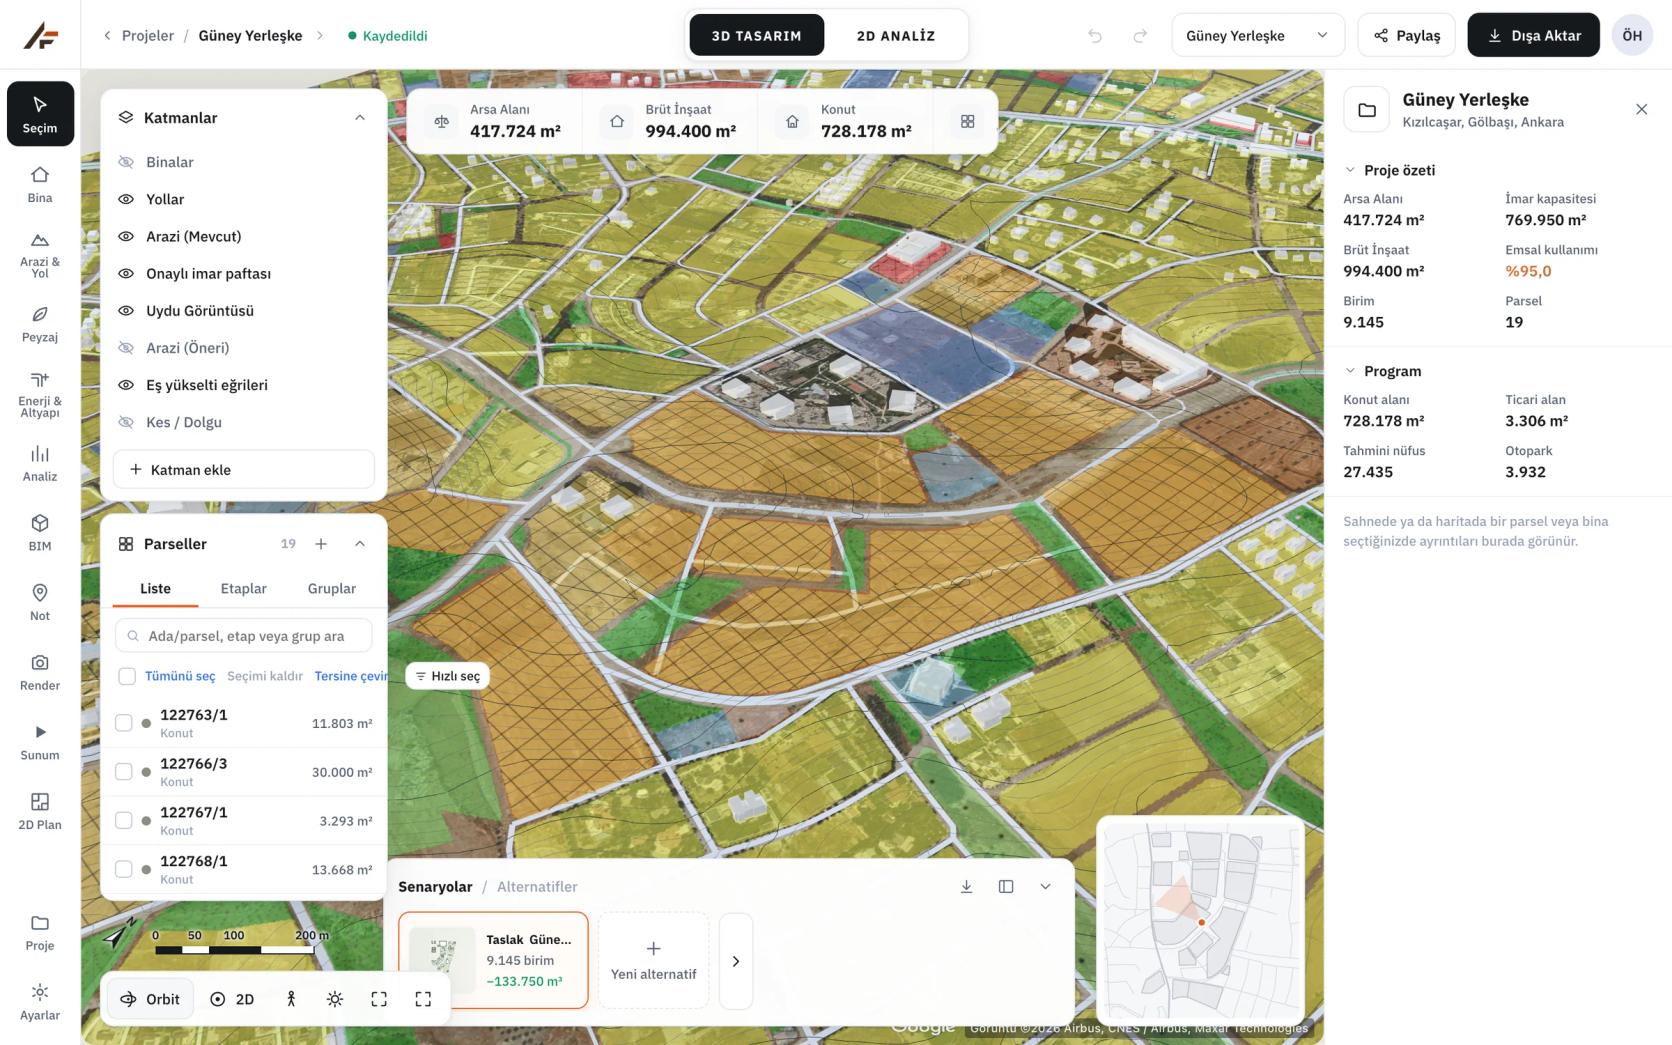
The same project opens in two modes. The layout you build in the scene uses the same data as the map analysis.
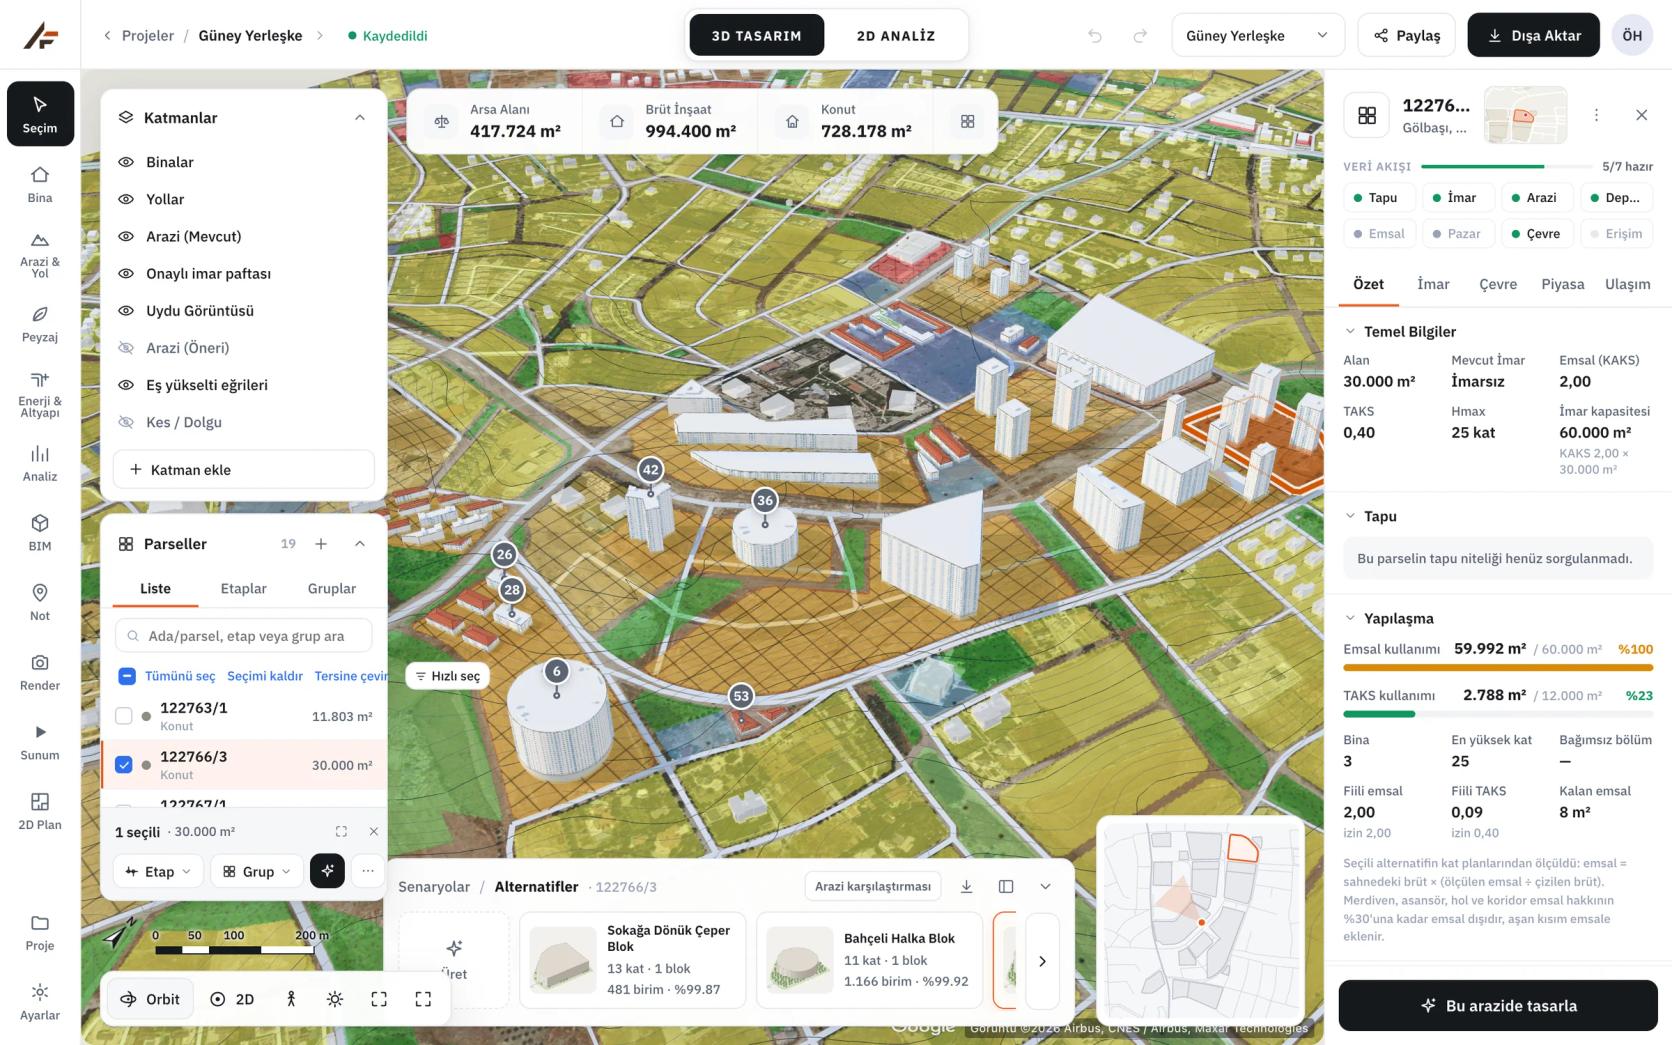
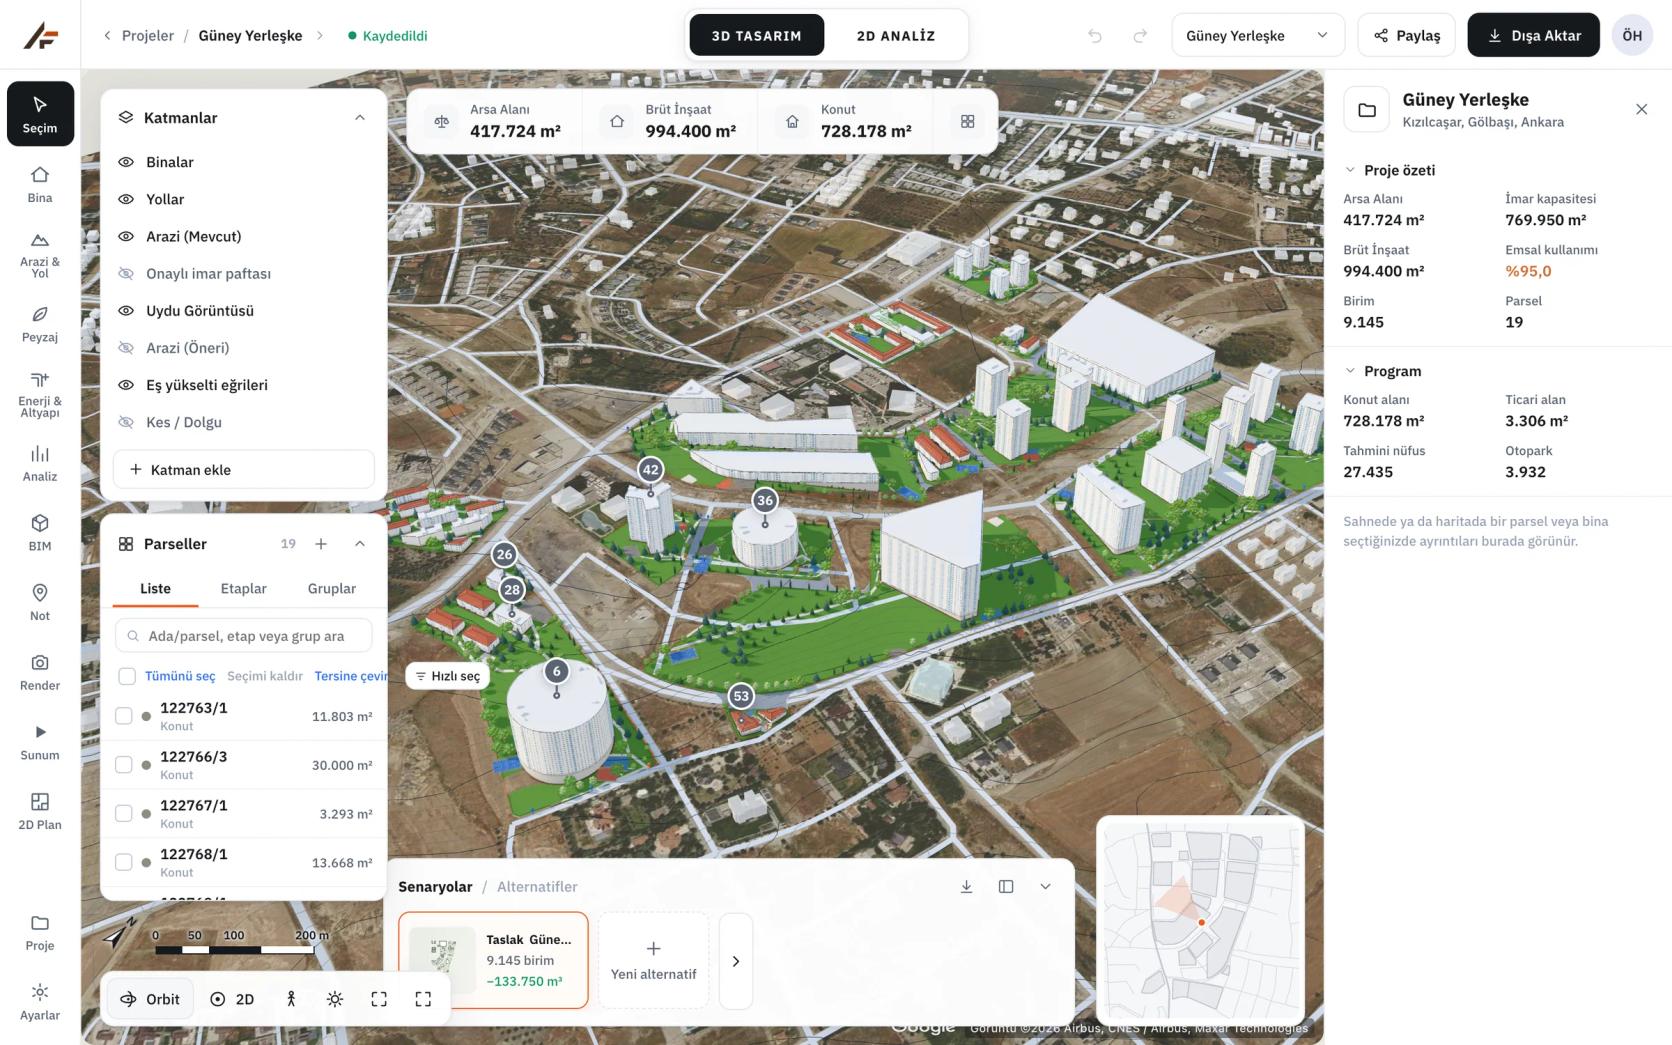
Massing is generated from each parcel's planning rules; typology, floors and orientation are adjusted in the scene.
The IFC model, deck, tour video and quantity table all come from the same scenario.
WHO USES IT
THE WORKSPACE
Masterplan opens the same project data as design, analysis, building and program views. A decision made on one surface shows up on the others immediately.
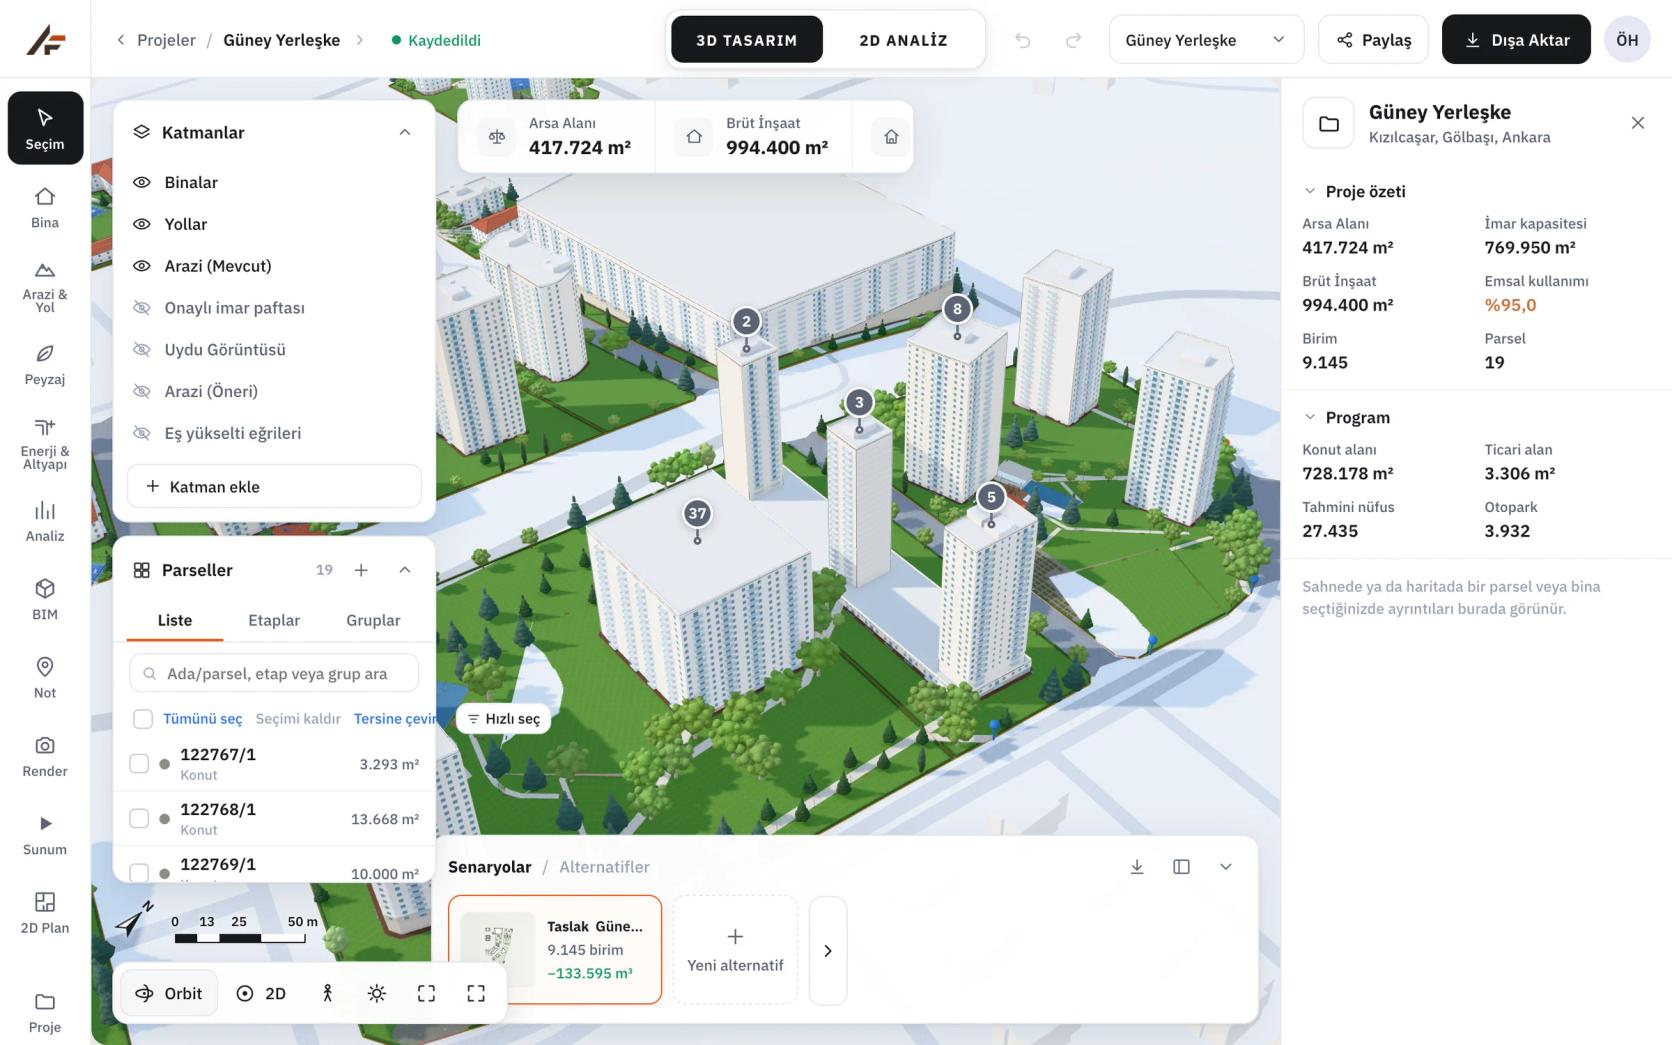
SCENE
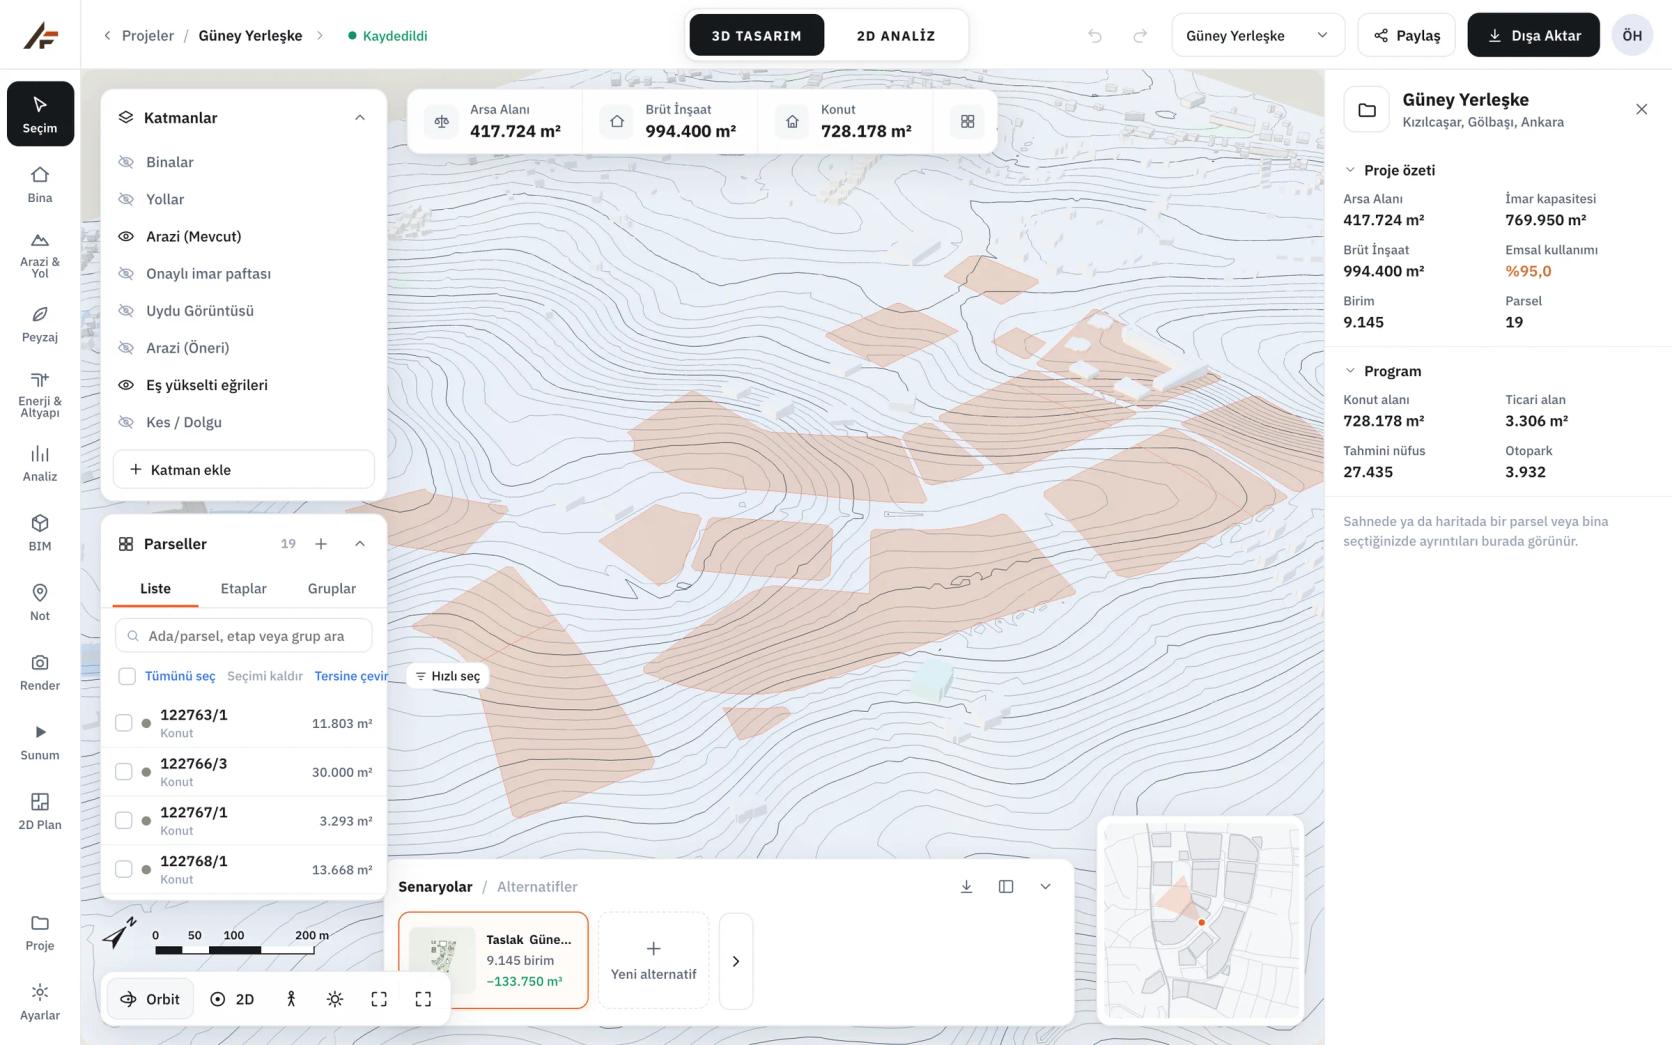
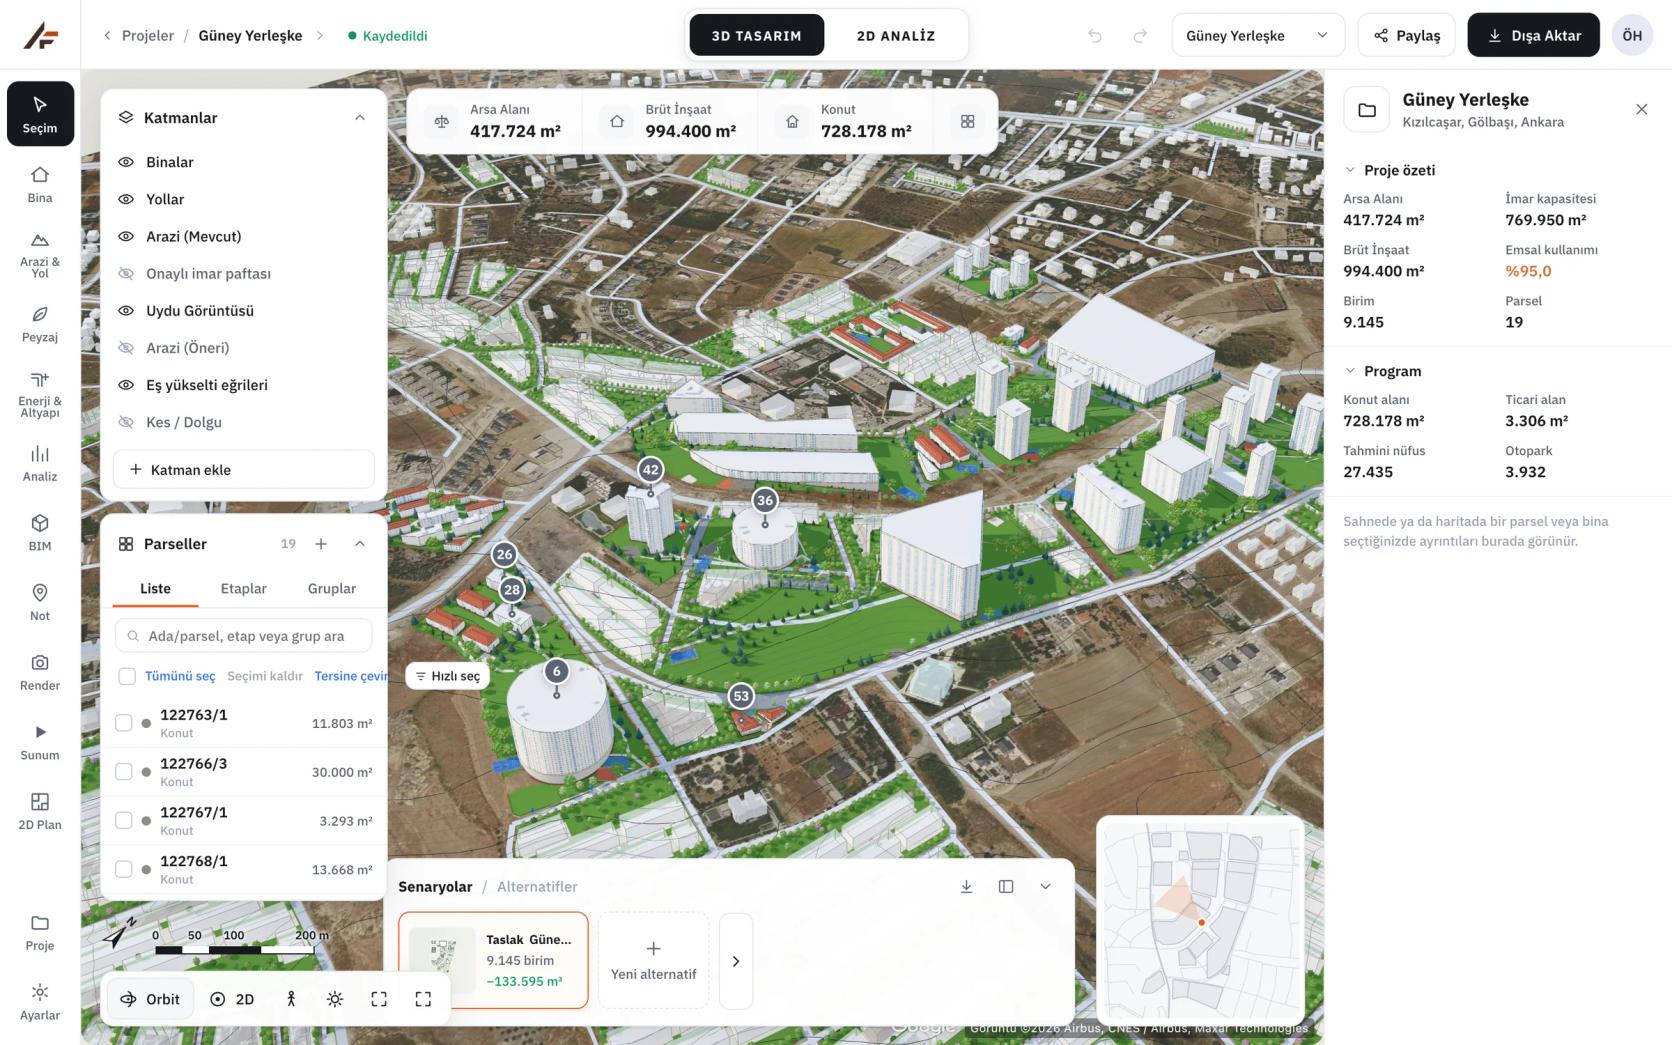
Parcels arrive in the scene with real cadastral geometry, a terrain model and surrounding buildings. Generate, select and move massing; the area and unit totals in the top strip update with every change.
Product screen · sample project
HIGHLIGHTS
Planning, terrain and program work that usually lives in separate files comes together in one project.
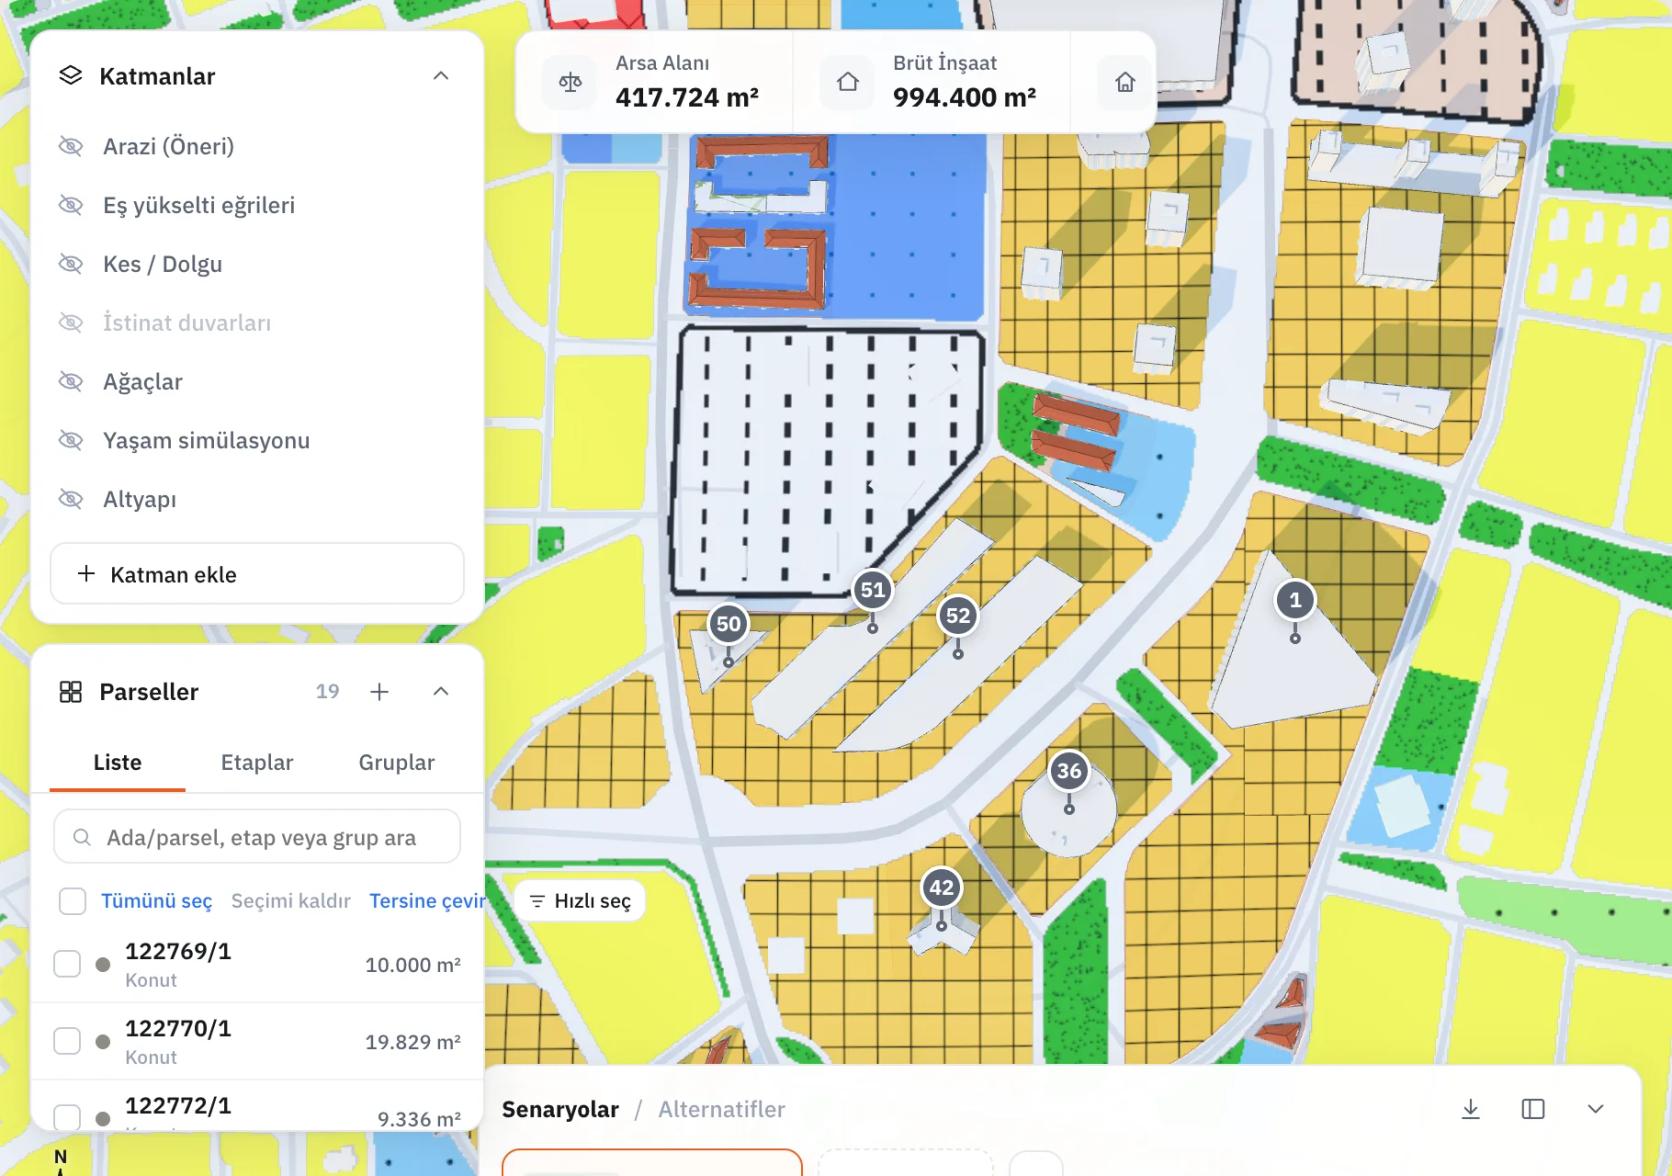
PLANNING AND PLAN SHEET
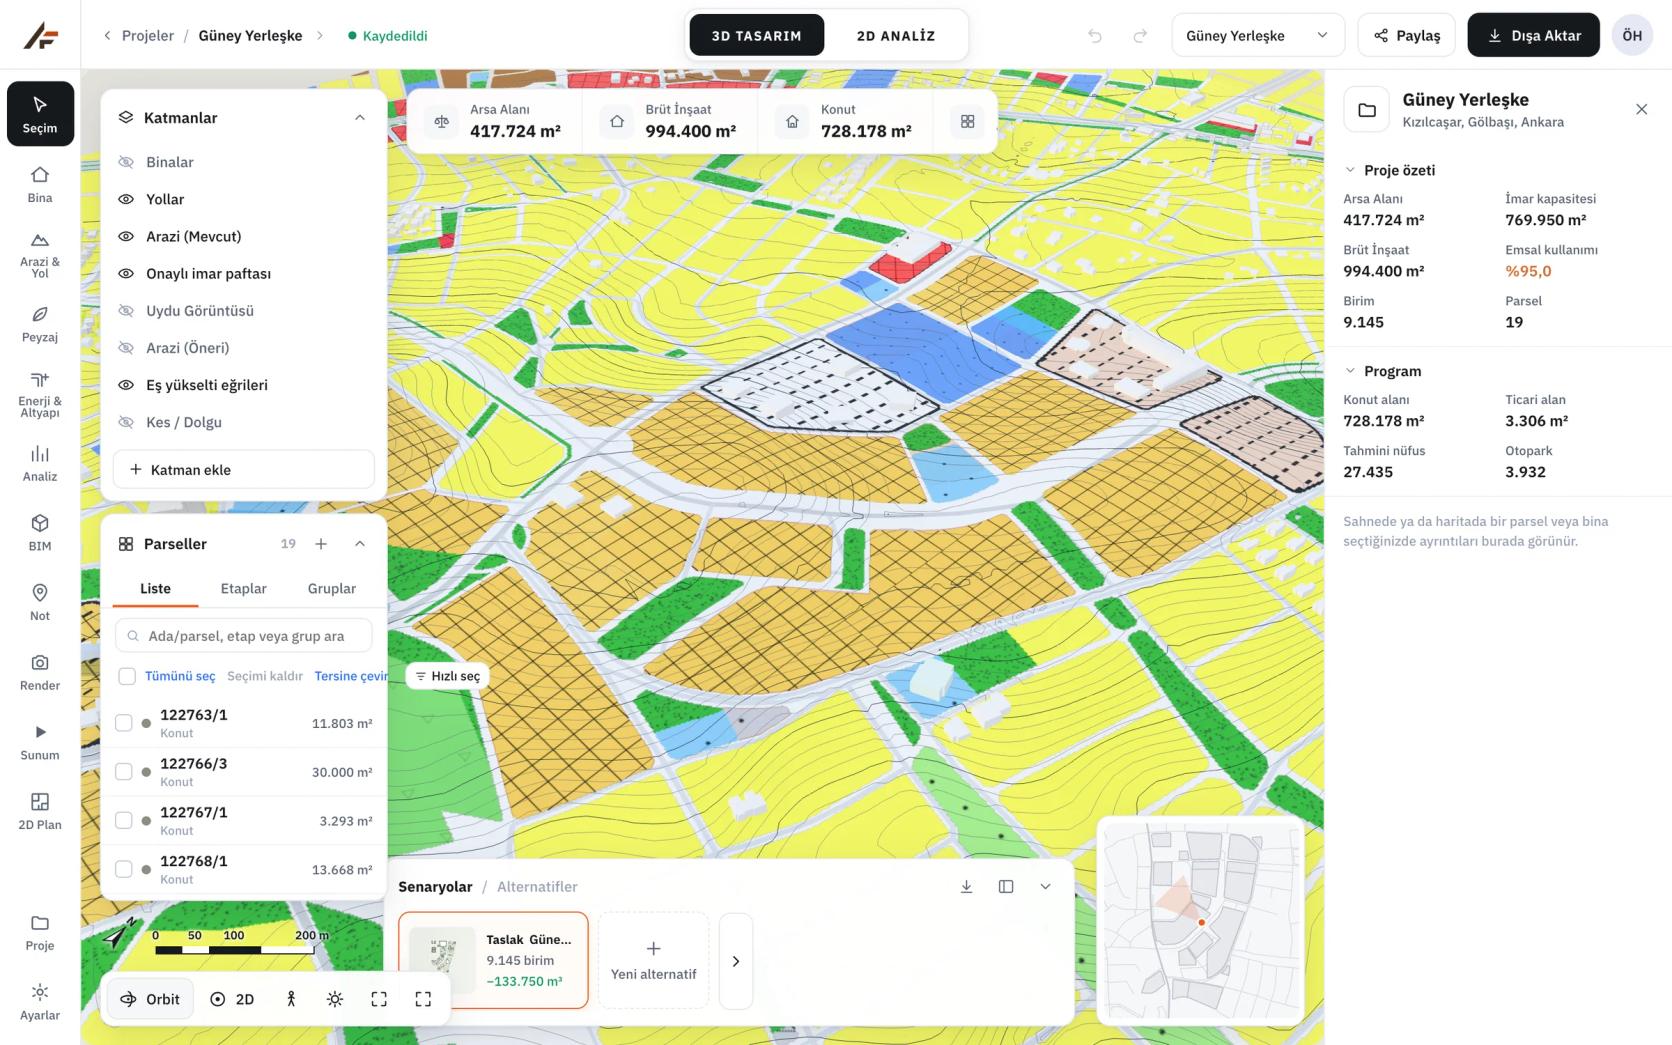
The municipality's approved plan data is draped on the scene and the map together with the parcels. Residential, commercial, public and green areas appear in their plan legend colours, so you see what the surroundings are zoned for while you lay out the site.
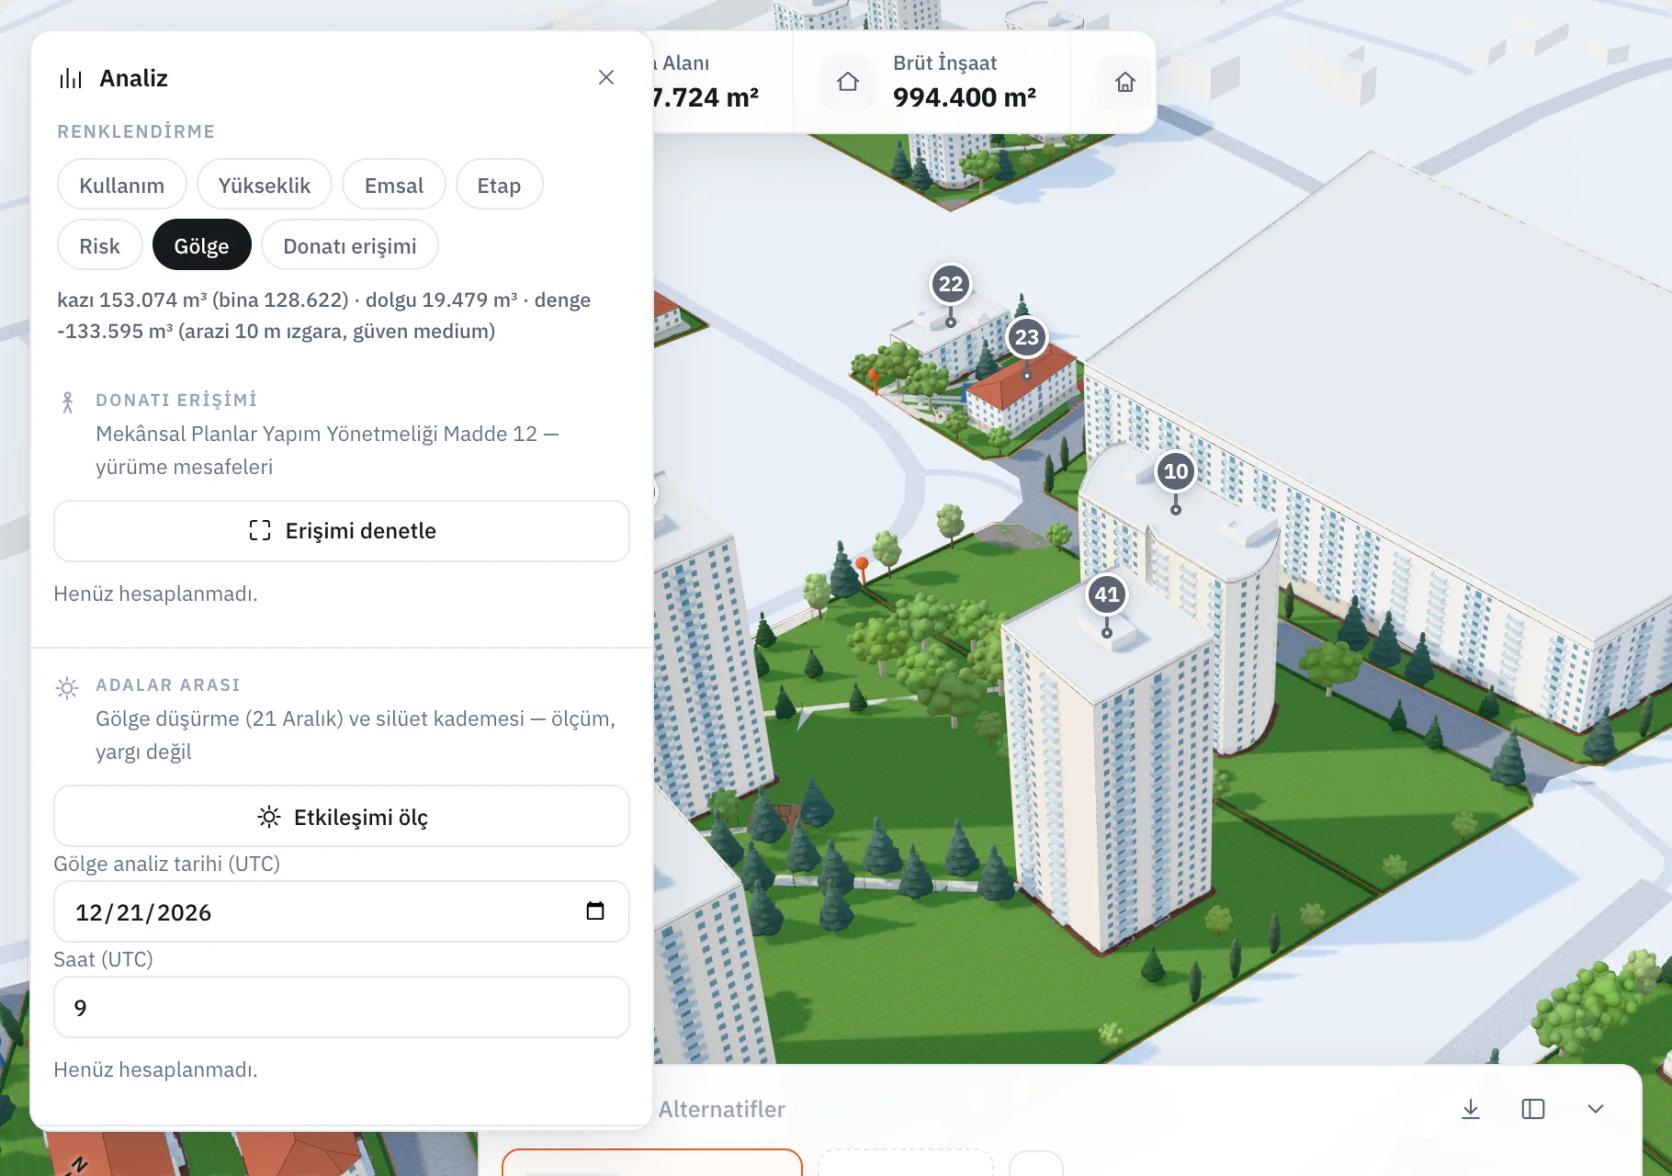
ANALYSIS
The analysis panel colours the scene by use, height, FAR, phase, risk and shadow. Cut and fill volumes are calculated from the terrain model; inter-block shadow and walking distances are measured in one click.
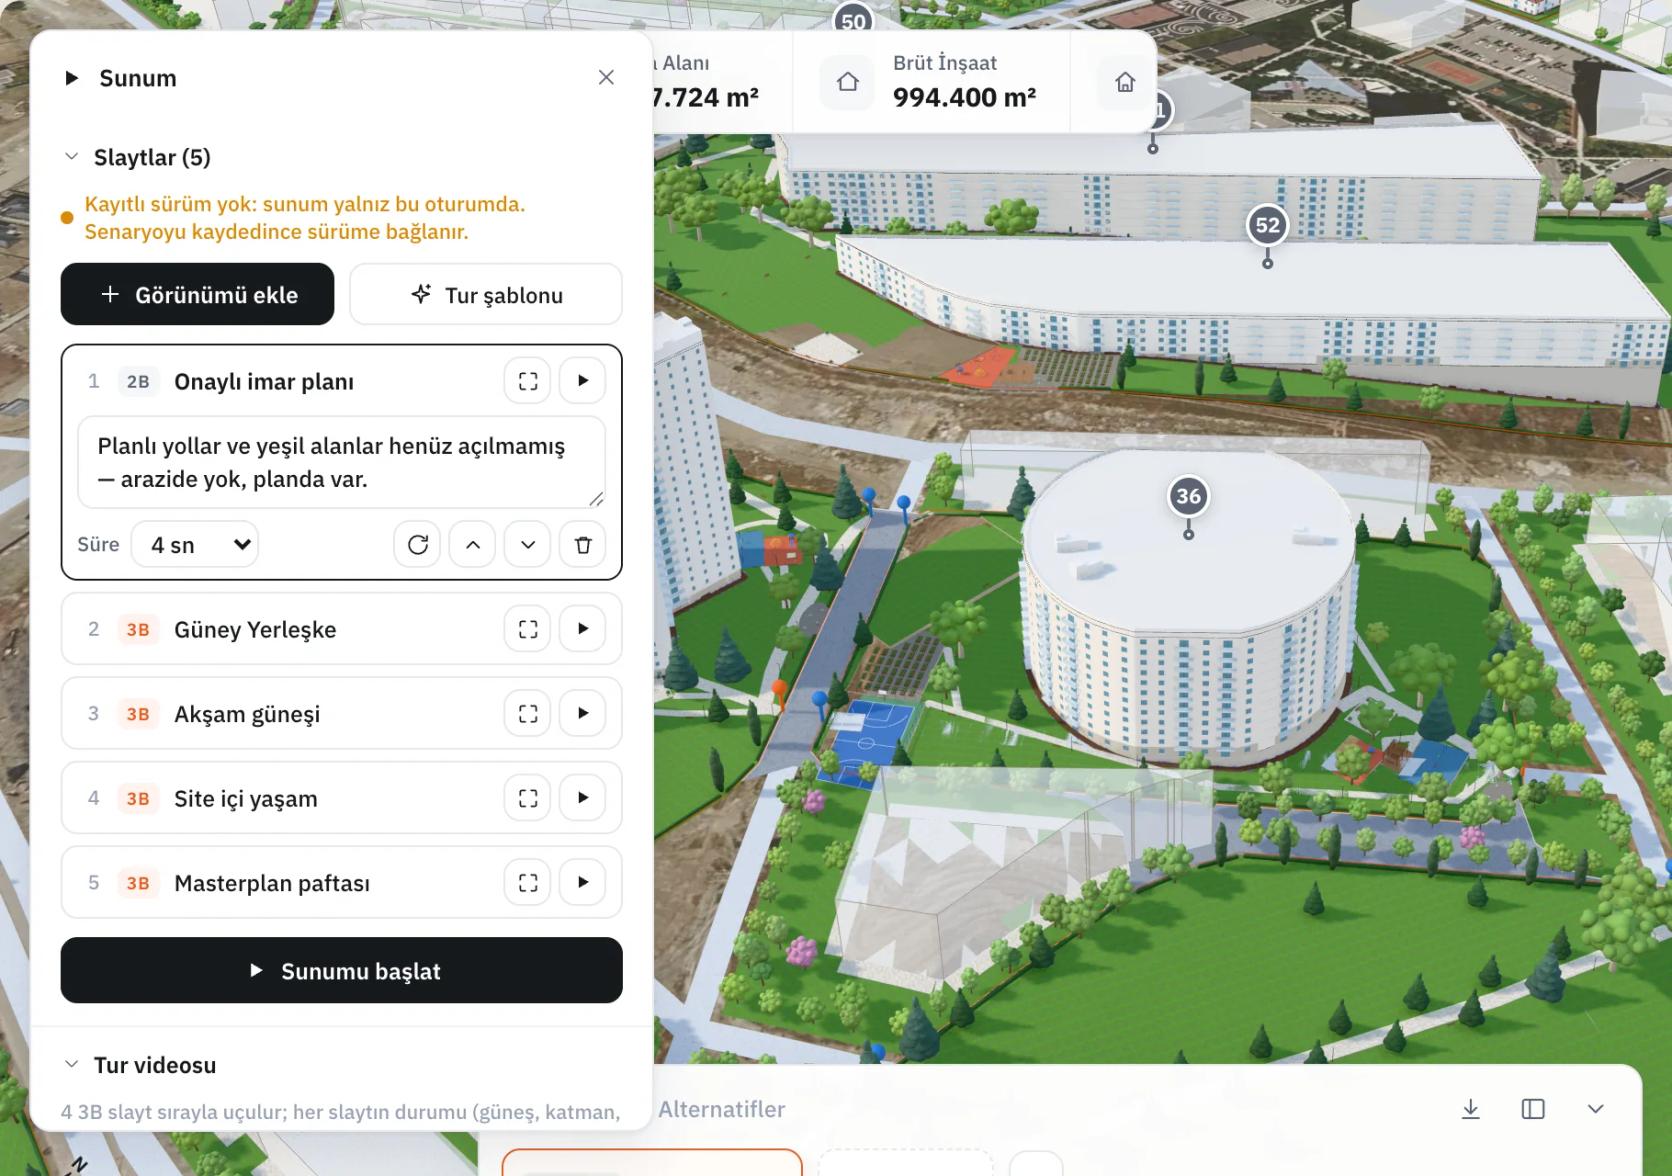
PRESENTATION
Add the views you like as slides and produce a short video with the tour template. The presentation package prepares standard frames, the tour video and the deck in one run.
INTERIOR STUDIO
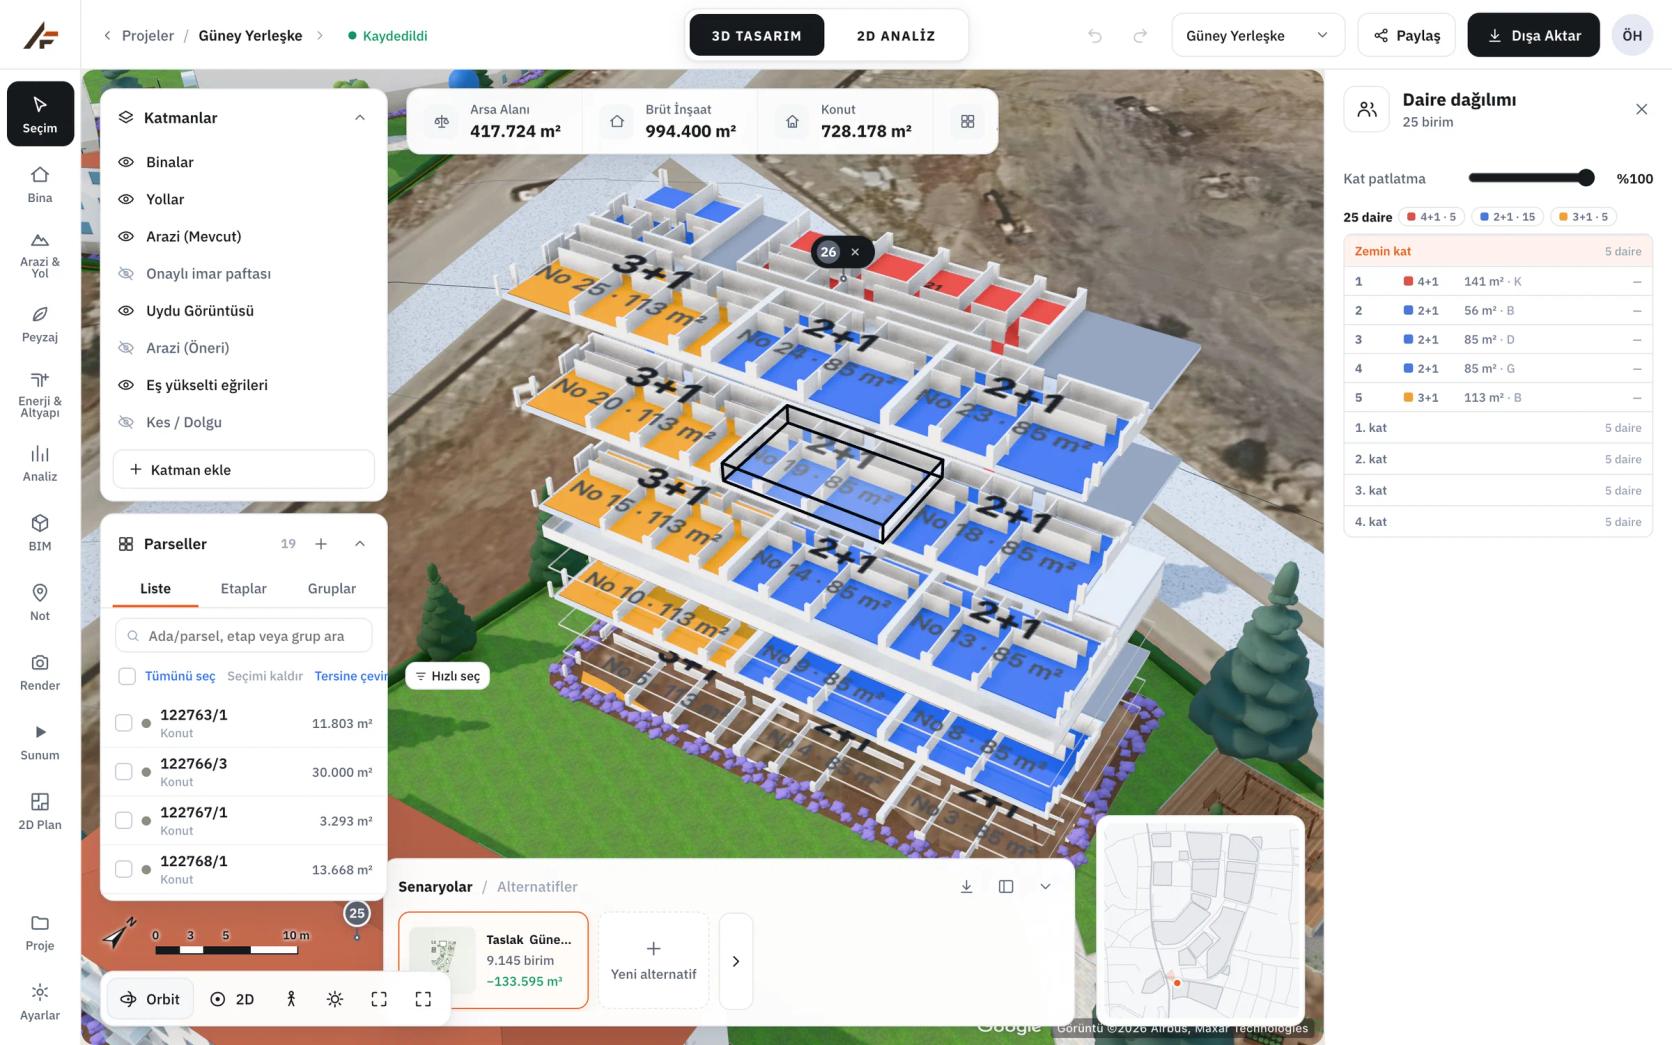
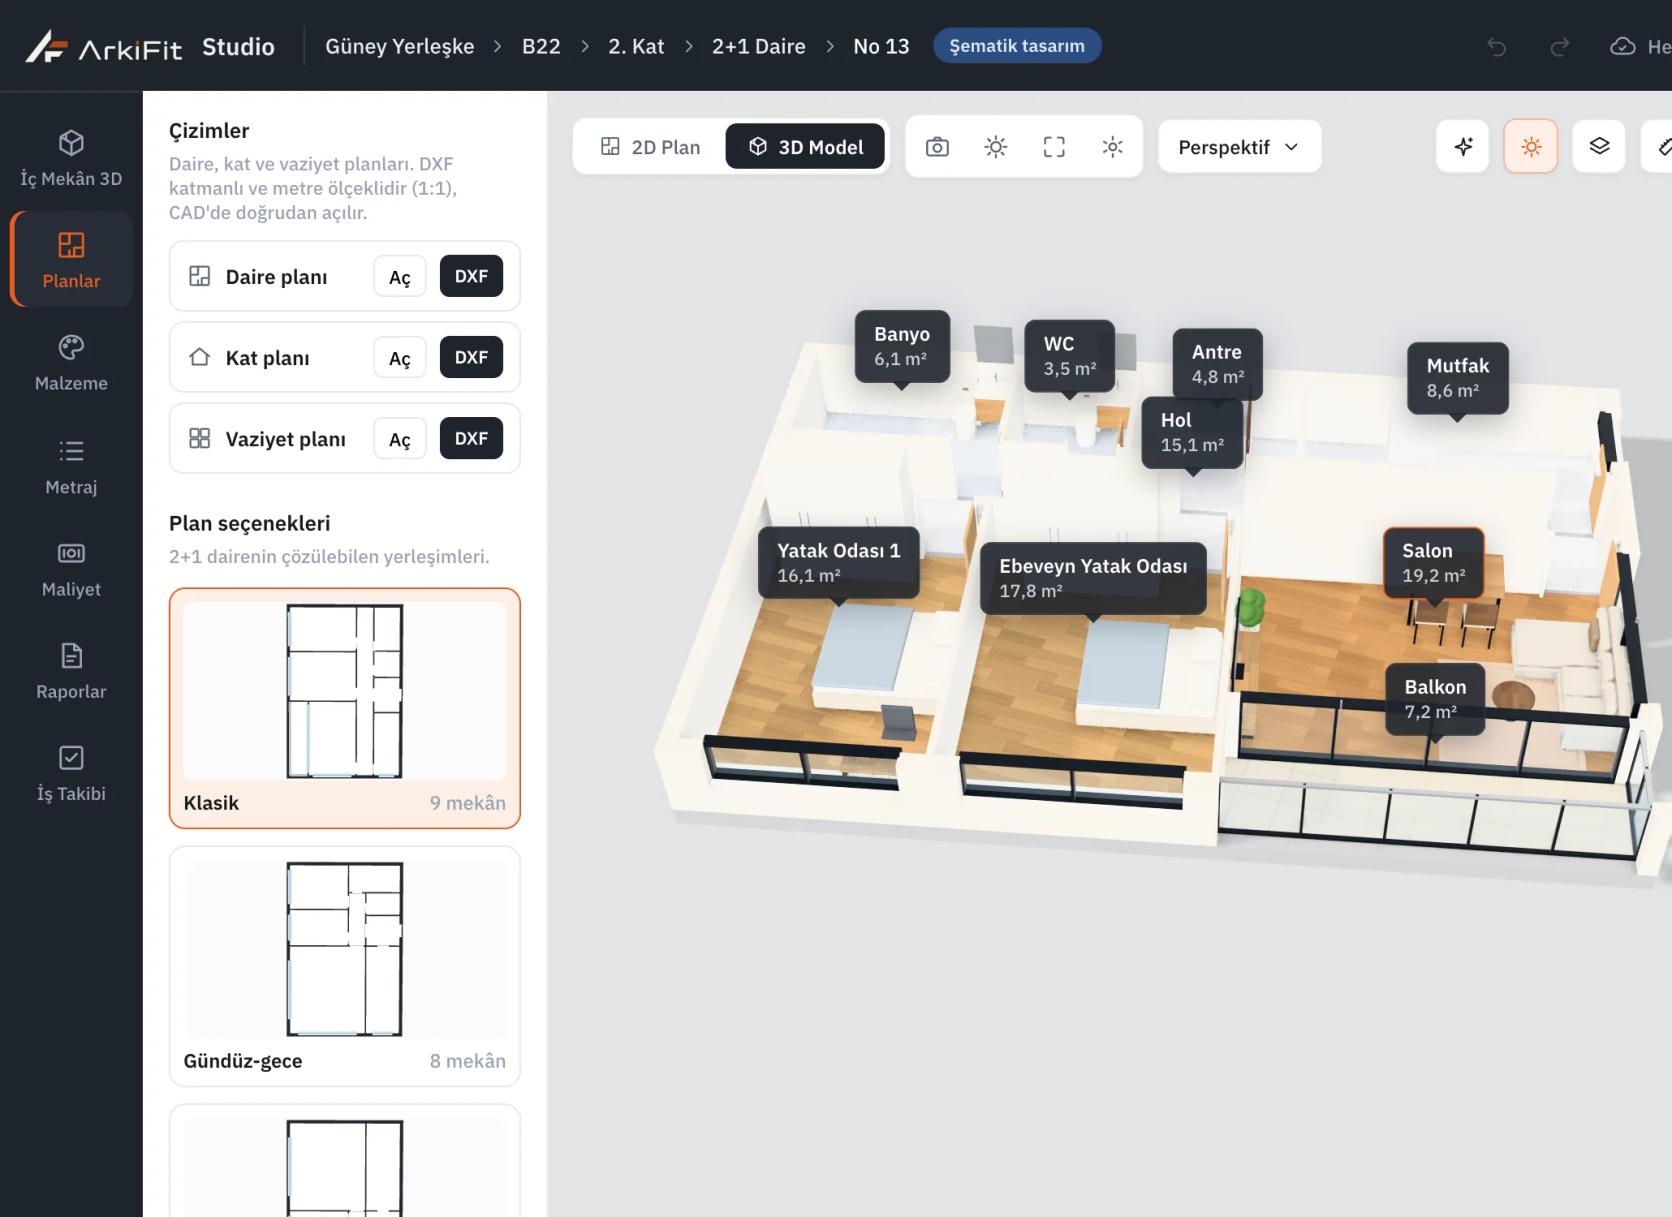
Double-click a unit in the unit mix view; the interior studio opens that unit's plan as a furnished 3D model. Edit rooms, floor and wall materials; quantities are measured directly from the plan.
ALL MODULES
The tools design and investment teams need, in the same decision process.
Paste a list or upload a file. Review matched, duplicate and unresolved records to build a clean project inventory.
Preserve each parcel's FAR, use and height rules. Distinguish sourced data from derived values and missing information.
Generate layout alternatives from each parcel's planning rules and shape. Set typology, floors, orientation and spacing parcel by parcel.
Upload your own survey or drone data. Contours, slope, cut and fill and retaining walls are calculated in the scene.
Turn on landslide, flood, seismic and forest layers on the map. Each layer states its method and data source in the interface.
Measure shadow cast between blocks and see how building heights affect neighbouring parcels before you decide.
Calculate parking demand against the regulation and treat courtyards and open space together with the landscape program.
See unit types and counts per building, open the typical floor plan and change the target unit size.
Consider nearby parcels together. Define phases and connect layout decisions with the development schedule.
Enter sourced sales, cost and land-share assumptions. Assess the financial effect of scenarios in a common framework.
Capture images from the scene, order the slides, produce the tour video. The presentation package is prepared in one run.
Give team members view or edit access, leave notes in the scene and share the project by link.
THE BASIS OF THE DATA
Different planning rights never disappear into an average. Masterplan evaluates each parcel on its own terms and builds the project total on that foundation.
Let's discuss your projectKNOW WHERE YOUR DATA COMES FROM
Cadastral geometry and planning rules available from the municipality
Calculated values, with their method and confidence level
Setback, sales, cost and land-share inputs
Missing information and items requiring verification remain visible.
HOW IT WORKS
Add parcels, review their geometry and planning rules, and complete missing values.
Start: your block and parcel listGenerate massing, compare 3D layouts, and assess analyses, phases and financial assumptions.
Work: design, analysis and feasibilityCarry the chosen scenario to your team as a model, tables, images and a presentation.
Result: a shared project scenarioStart with your existing list and terrain data. Continue in the formats your team uses.
YOUR QUESTIONS
If your question is not here, we can go through it on your own project in a demo.
Architects, developers, contractors, investors and valuation teams assessing multiple parcels together. It connects land, design and feasibility decisions in a shared project.
Start with a block and parcel list. Paste the list or upload an XLSX, CSV or TSV file. Unmatched records and missing planning information are reviewed separately and completed according to the scope of the project.
Parcel geometry comes from the cadastre and planning rules from the municipality's open system. A value the source does not provide is not estimated; it stays empty and you are asked for it. The value you enter is flagged as an assumption and kept apart from source data.
Yes. You can attach a DXF, GeoTIFF or LAS file to the project. Without one, an open satellite elevation model is used; it is suitable for pre-feasibility and is labelled as such in the interface.
The 3D layouts support early-stage massing and development decisions. They do not replace permit or construction documentation. Qualified professionals need to develop the selected approach in detail.
We can discuss your parcel portfolio, analysis needs and team workflow, then explore how parcel management, 3D alternatives, phasing, feasibility and exports fit your project.
FOR YOUR NEXT PROJECT
Tell us about your parcels and goals. See how Masterplan can support your project on your own data.
A conversation tailored to your team and project.